 So you’ve researched topics and keywords, written a blog post, and published it to your website. Now what?
If you’re thinking it’s time to sit back and let Google do its thing, I’ve got bad news for you — creating content is just the first step in the process of getting the traffic and leads you want.
Instead of patiently waiting for readers to discover your blog post, now is the time to be proactive and start promoting your content. Promotion is a vital step in driving readers to your website and helping you avoid getting lost in the black hole of search engine results.
However, most people don’t have a ton of time or a social media team at their disposal — so you need to be as efficient as possible. Below, I’m sharing five of my best timesaving tricks to promote your content.
1. Batch social media posts
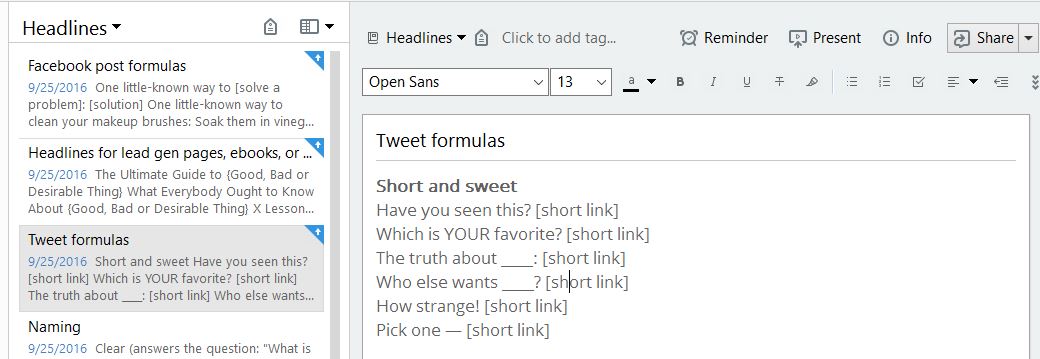
When you write content, do you write social media posts to go with it? You should. I always write between 2-5 social media posts for each network while I’m creating a piece of content.
Facts or useful tips from a blog post make great Tweets! And, this saves me from having to go back to the post every time I want to promote it on Twitter or LinkedIn.
Be sure to include a link to your blog article in your social media post so that people can easily discover your content. I recommend using a link shortener like Bitly to shorten URLs for sharing. This is especially important if you’re sharing links on Twitter, where you’ll only have 140 characters for your message.
To shorten your links, copy the URL from your blog post into Bitly, then click ‘Create’. The result will look like this:
http://bit.ly/3nHBa77
Now you can copy and paste the shortened URL into any of your social media posts! This will take up less space and look neater than a lengthy URL.
2. Use templates
You can save even more time batching your social media posts by using templates. Just fill in the blanks for your topic and you’re good to go!
I keep a list, or ‘swipe file’, of my favorite social media templates for each network. Whenever I find a post format that works really well, I add it to my swipe file to use again later. This saves me a ton of time and eliminates the guesswork that makes a lot of social media posts ineffective.
Keep a swipe file of your favorite Tweets and Facebook posts in Evernote.
If you use branded images to promote your content (and you should be), you can easily create templates for those too. Some designers swear by Photoshop, but I prefer Canva because it’s so easy to use. Just select one of their premade social media templates, change the text, and add your image.
3. Create images for every network
Each social media network uses its own image sizes. So if you’re sharing your post on multiple networks, you’ll need to create a new image for each network. That used to mean creating Photoshop or Canva templates for every network (and a lot of repetitive work). But with Canva for Work, now you can magically resize your images without starting over.
Once you’ve created an image from a template (like in step 2 above), all you have to do is choose the other image sizes you need and click “Magic Resize”. Canva does the rest!
4. Schedule evergreen content promos
You’ve spent a lot of time creating your content, so it doesn’t make sense to only promote it once or twice. Instead, consider scheduling a handful of social media posts at different intervals to promote the same article.
You can use a tool like Hootsuite or Buffer to schedule evergreen content promos for the upcoming weeks or months.
Watch this step-by-step video on how to schedule social media updates
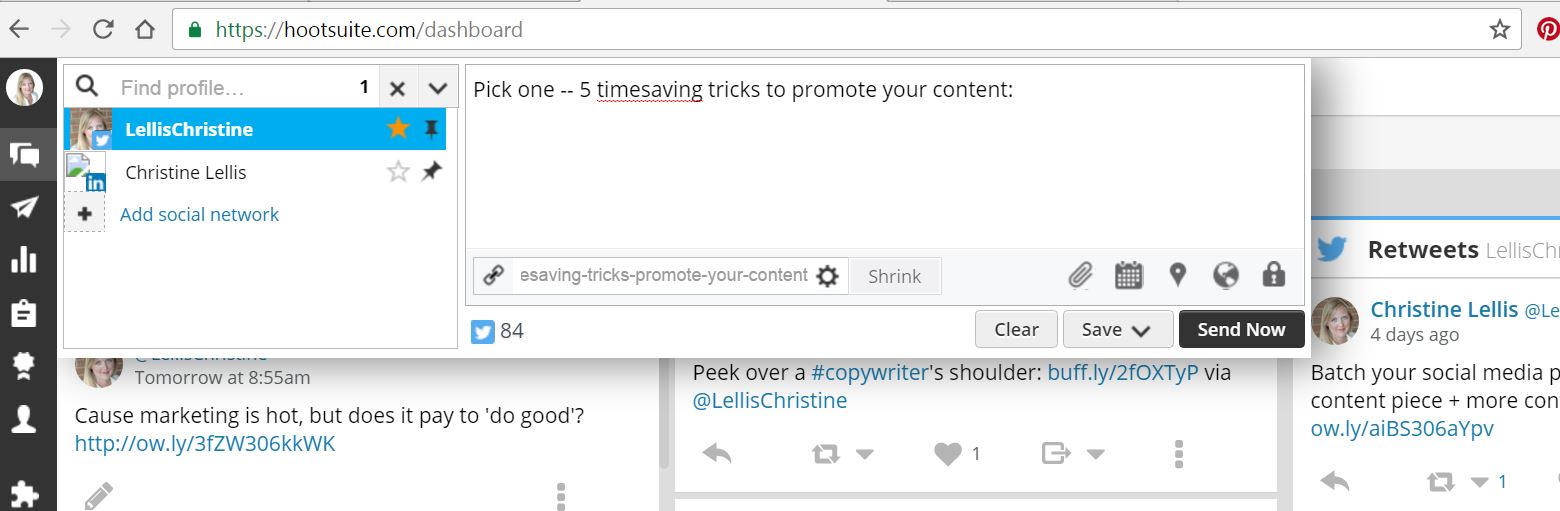
To schedule your posts, log in to Hootsuite (or create an account) and click “Compose Message”. Select the networks you want to post to, then type your message. This is where the social media posts you created in step #1 come in handy! You can also use the “shrink” button to shorten your links.
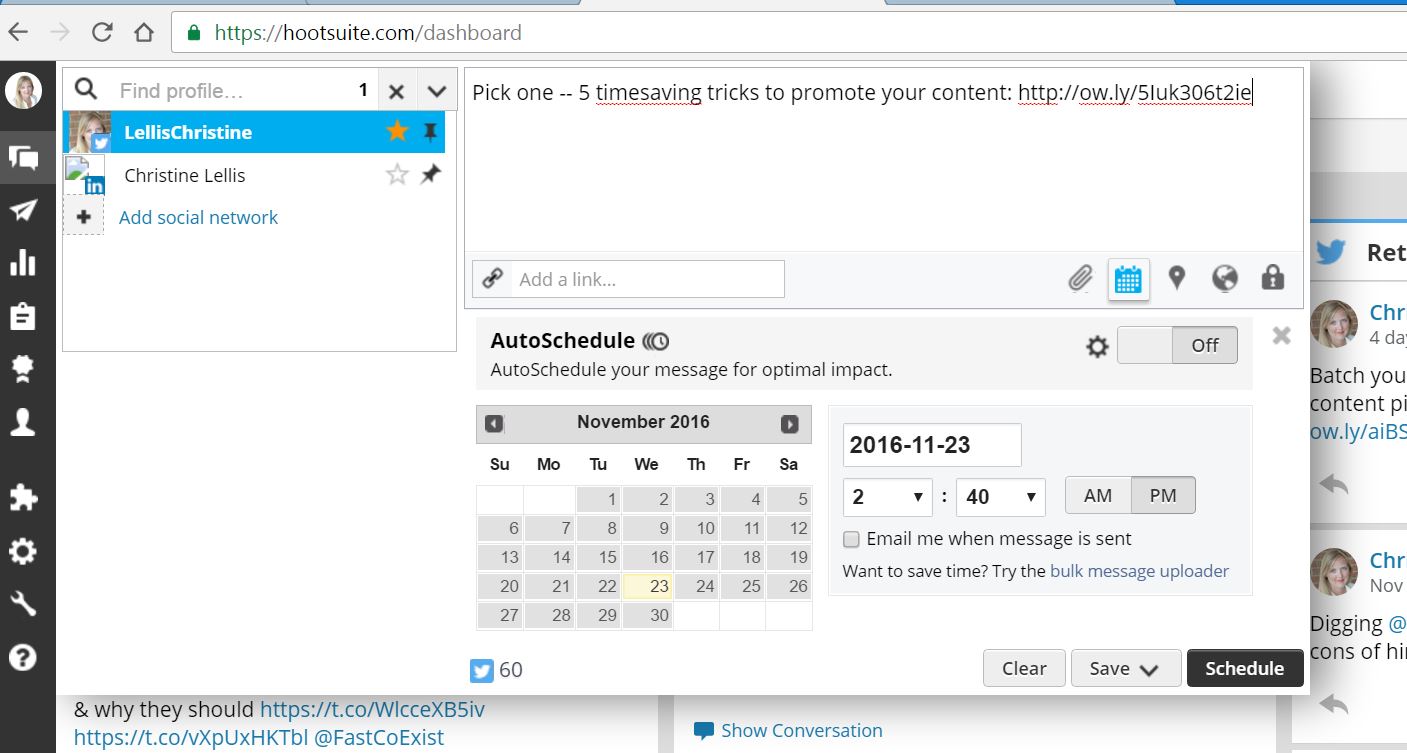
Then click the calendar icon and choose the date and time you want Hootsuite to publish your update. I like to schedule posts at 1 day, 1 week, 1 month, 3 months, and 6 months after publishing.
5. Share content automatically with autofeeds and plugins
You can save even more time by automating parts of your content promotion. If you use a tool like Hubspot, you can set up a feed that will publish your post to social media automatically. This will save you from having to manually share your posts.
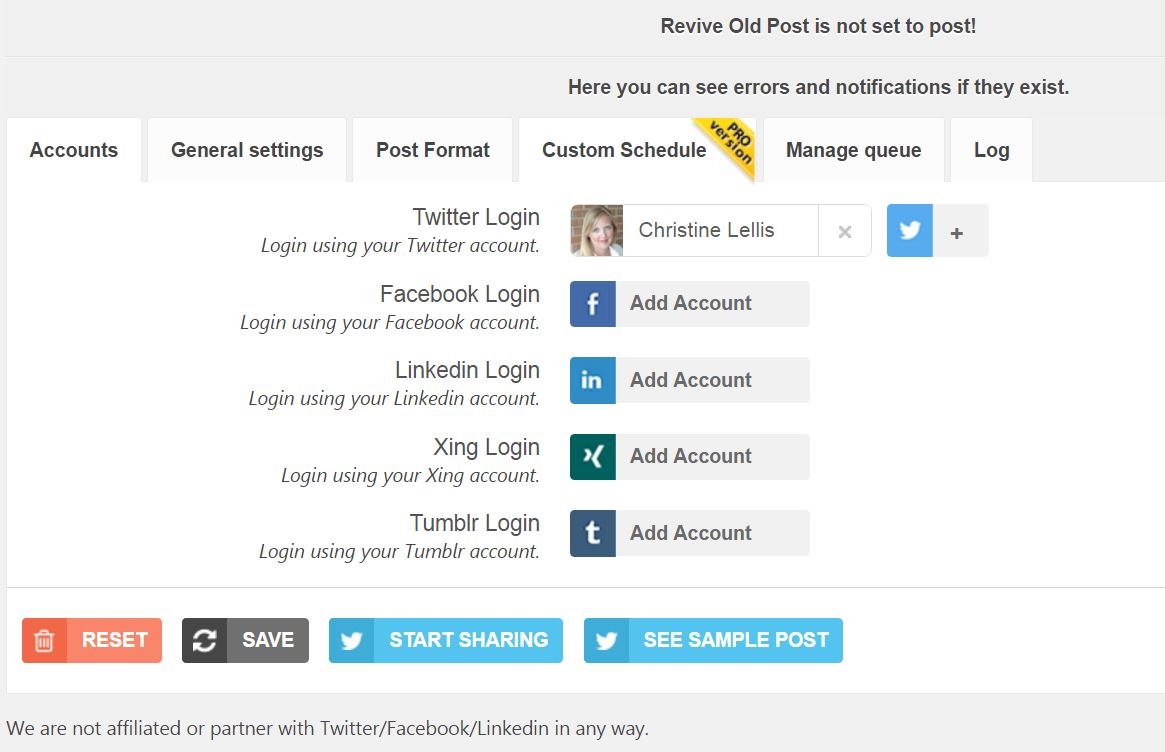
For WordPress users, Revive Old Post is a free plugin that automatically promotes your old content on Twitter, Facebook, and LinkedIn. After you install the plugin, you’ll need to add your social media accounts and choose which posts you want the plugin to share, frequency, and what info gets included. I recommend clicking “See Sample Post” before you save all your settings.
Meet Edgar ($49/mo.) is another time-saving social media tool. Instead of publishing your social media updates once, Edgar stores them in a library and recycles them later to boost your traffic.
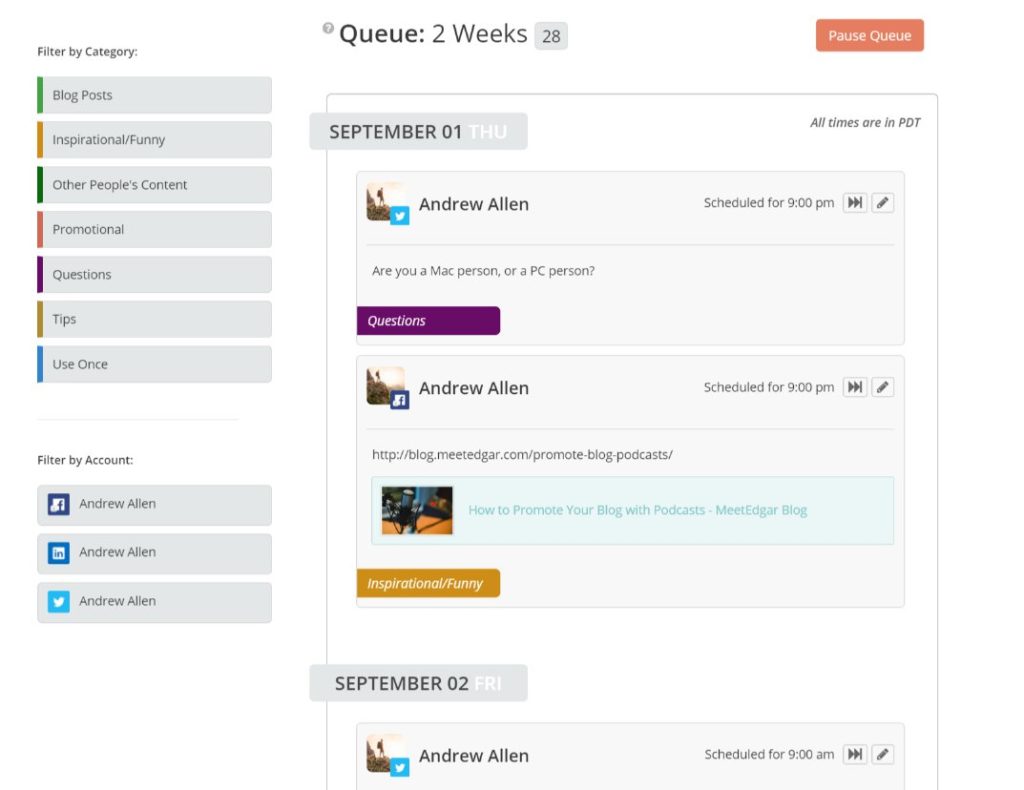
Create a library of your social media updates. (Via Meet Edgar.)
What are your time-saving tricks to promote your content?
![]()
[/vc_column_text][/vc_column][/vc_row]
 I'm Christine Lellis, a copywriter and certified content marketer from Michigan.
Can I just say what a relief to discover somebody who genuinely knows what they’re discussing
over the internet. You certainly realize how to bring an issue to light and make it
important. A llot more people ought to check this out and
understand this side of the story. I was surprised youu are not more popular since you most certainly have
the gift.